Winter Camping Gear: Everything You Need to Stay Safe and Warm
Venturing into a snow-blanketed landscape for a winter camping trip is one of the most rewarding outdoor experiences. The crowds have vanished, replaced by a profound silence and stunning, pristine vistas. However, this unique adventure demands serious preparation. Unlike summer camping, the margin for error in winter is slim. Having the right winter camping gear is not merely about comfort; it is a fundamental requirement for safety and survival. Your equipment is your first line of defense against the cold, wind, and snow. This comprehensive guide will walk you through every piece of essential gear, from your shelter to your socks, ensuring you are fully prepared to stay safe, warm, and enjoy the magic of a winter night outdoors.
To thrive in the cold, your strategy should revolve around two core principles: insulation and moisture management. You need a shelter that can withstand heavy snow and high winds, a sleep system that effectively traps body heat, and a clothing system that wicks sweat while retaining warmth. Furthermore, your body burns significantly more calories to stay warm, so nutrition and hydration become even more critical. This guide is structured to provide a detailed, list-based overview of all the necessary equipment, organized by category. We will delve into the specifics of four-season tents, cold-weather sleeping bags, layered clothing, and vital safety tools like avalanche gear, giving you the confidence to pack for your next frosty adventure.
The Ultimate Winter Camping Gear Checklist
Navigating the gear requirements for winter can feel daunting. The following table provides a high-level overview of the essential categories and items you’ll need to consider. Use it as a quick reference before diving into the detailed explanations for each section.
| Gear Category | Essential Items | Key Considerations |
|---|---|---|
| Shelter & Sleep System | 4-Season Tent, Sleeping Bag, Sleeping Pad(s), Pillow | Focus on wind resistance, temperature ratings well below expected lows, and insulation from the ground. |
| Cooking & Hydration | Stove, Fuel, Cookset, Insulated Water Bottles | Stove must perform in cold; plan to melt snow for water; prevent water from freezing. |
| Clothing & Footwear | Base Layers, Mid Layers, Outer Shell, Insulated Boots, Accessories | Layering is critical; materials must wick moisture (no cotton); keep extremities covered. |
| Safety & Navigation | First-Aid Kit, Headlamp, Avalanche Safety Gear, Map & Compass | Assume you will encounter whiteouts and freezing temperatures; prepare for emergencies. |
| Personal & Tools | Toilet Kit, Repair Kit, Snow Shovel, Personal Items | Includes items for comfort and utility, with a focus on multi-use and lightweight options. |
Shelter and Sleep System: Your Winter Haven
Your tent and sleeping gear form your refuge from the elements. Compromising here is not an option, as this system protects you during the most vulnerable part of your trip: when you are stationary and the temperatures plummet.
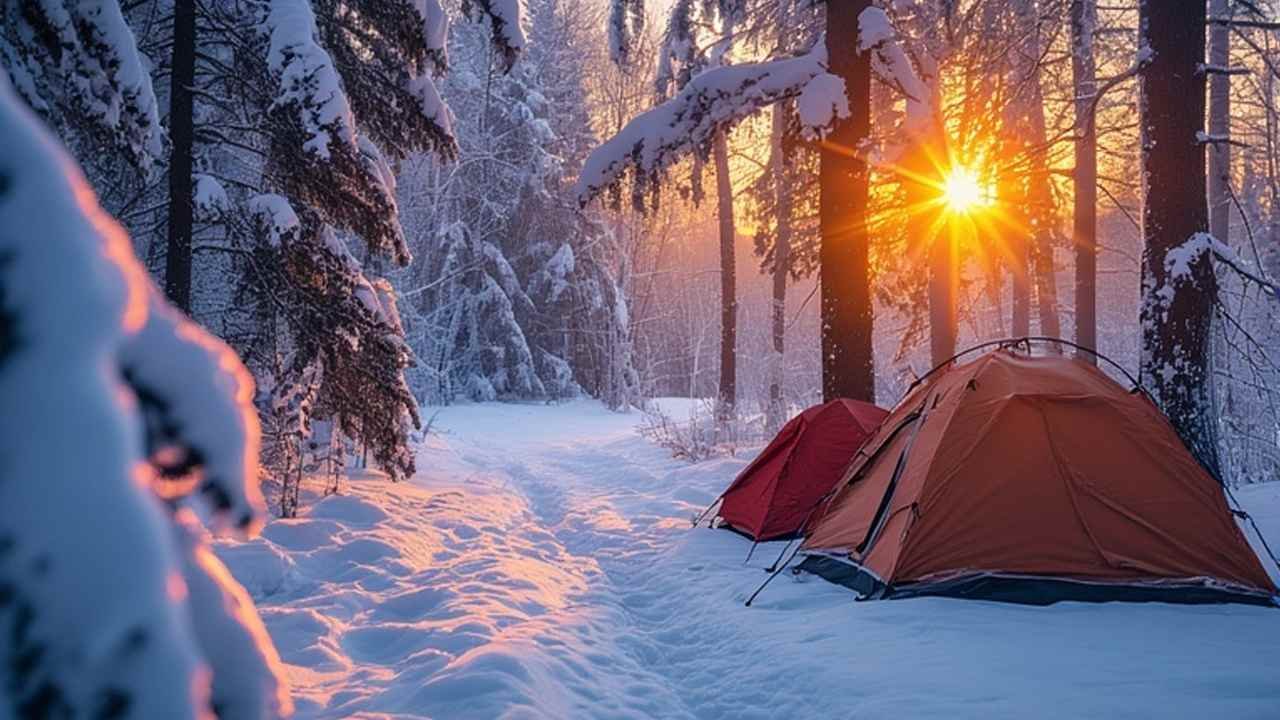
1. The Four-Season Tent
A three-season tent might suffice for mild, sheltered winter trips, but for true winter conditions, a four-season model is recommended . These tents are engineered with several key features:
- Robust Structure: They feature stronger poles and more durable fabrics to handle heavy snow accumulation and powerful wind gusts without collapsing .
- Protective Design: The rainfly extends closer to the ground, and there is less mesh to prevent swirling snow and wind from entering the living space .
- Ventilation Control: Despite being more sealed, they offer adjustable ventilation to manage condensation, which is a major concern in cold weather .
When selecting a site, choose a spot sheltered from the wind and, most importantly, completely free of avalanche risk . Once you’ve found your spot, pack down the snow with your skis or snowshoes before pitching your tent to create a stable platform . To secure your tent, use snow stakes or the “deadman” technique by burying stuff sacks filled with snow .
2. The Warm Sleeping Bag
Your sleeping bag is your primary source of warmth through the long winter night. Follow these guidelines to ensure you don’t get cold:
- Temperature Rating: Select a bag rated at least 10°F (or more) lower than the coldest temperature you anticipate encountering . It’s always better to have a warmer bag that you can vent than a colder one that leaves you shivering.
- Insulation Type: Down insulation offers an excellent warmth-to-weight ratio but loses its insulating properties when wet. Synthetic insulation retains warmth even when damp and is often more affordable, making it a robust choice for wetter winter conditions .
- Heat-Saving Features: Look for a mummy-style hood, a draft collar around the shoulders, and a draft tube behind the zipper to prevent heat from escaping .
If you are unsure about your bag’s rating or simply want a boost, a sleeping bag liner is a fantastic addition. A liner can add anywhere from 5°F to 25°F of extra warmth and also helps keep your sleeping bag clean .
3. Insulated Sleeping Pads
Insulating yourself from the cold ground is just as important as the sleeping bag above you. The ground will draw heat from your body much faster than the cold air. You need a sleeping pad with a high R-value, which measures its resistance to heat flow.
- R-Value Goal: For winter camping, aim for a combined R-value of 4.0 or higher . Many winter campers achieve this by stacking two pads: an inflatable pad with a high R-value and a closed-cell foam pad . This system provides superior insulation and also acts as a backup if your inflatable pad fails.
Kitchen and Hydration: Fueling the Fire Within
Cold weather dramatically increases your body’s energy expenditure. Staying well-fed and hydrated is not just about satisfaction; it’s a critical safety measure that fuels your internal furnace.
What to Pack for Your Winter Kitchen
- Stove and Fuel: Not all stoves perform well in freezing temperatures. Liquid-fuel stoves (white gas) are generally more reliable in the cold than canister stoves, as the fuel is less affected by low pressure . If you use a canister stove, ensure it has a pressure regulator and keep the canister warm in an inner jacket pocket before use .
- Cookset: Bring a large pot specifically for melting snow. It takes a surprising amount of snow to produce a small amount of water, so a large volume is key . To avoid scorching the snow and giving your water a bad taste, always start with a little liquid water in the bottom of the pot before adding snow .
- Food and Meals: Plan for high-calorie, simple-to-cook meals. Your body burns more calories to stay warm, so you’ll need more fuel . Freeze-dried meals are convenient, or you can prepare one-pot meals like stews or pastas at home and simply reheat them . For lunch, avoid long, cold breaks; instead, snack frequently on high-energy foods like nuts, cheese, and bars .
Hydration Strategies to Prevent Freezing
Dehydration is a real risk in winter, as you may not feel as thirsty as you do in summer. Furthermore, your water supply is constantly threatened by freezing.
- Bottles Over Bladders: Use wide-mouth insulated water bottles instead of hydration bladders. The tubes on bladders freeze almost instantly, rendering them useless .
- Prevention Techniques: Keep your water from freezing by storing bottles upside down (ice forms at the top first) and placing them in a cozy insulated sleeve . A pro tip is to fill a bottle with hot water and put it in your sleeping bag at night—it serves as a heater and provides unfrozen water for the morning .
- Nighttime Routine: Before bed, melt enough snow to fill all your bottles for the next day. This saves you time and fuel in the morning and ensures you start the day hydrated .
Clothing and Footwear: Mastering the Layering System
The secret to staying warm and dry in the winter is not one single heavy garment, but a system of layers that work together. This allows you to fine-tune your insulation as your activity level and the weather change.
1. The Base Layer: Your Second Skin
This is the layer worn directly against your skin, and its primary job is moisture management.
- Material is Everything: Choose synthetic fabrics like polyester or natural merino wool . These materials wick sweat away from your body, keeping you dry. Avoid cotton at all costs—it absorbs moisture and holds it against your skin, rapidly cooling you down and increasing the risk of hypothermia .
2. The Mid Layer: Your Primary Insulation
The mid layer traps the heat your body produces.
- Fleece: Offers excellent warmth, breathes well, and retains some insulation even when damp.
- Down: Provides the best warmth-to-weight ratio when dry, making it perfect for cold, static periods in camp.
- Synthetic Insulation: A great choice for active use or wet conditions, as it dries quickly and provides warmth even when wet.
3. The Outer Layer: Your Weather Shield
This is your waterproof and windproof shell, protecting you from snow, rain, and wind.
- Jacket and Pants: Look for durable, breathable materials like Gore-Tex . A good shell will have sealed seams to prevent water from leaking through the stitching. This layer should be roomy enough to fit comfortably over all your other layers without restricting movement.
4. Essential Accessories: Protecting Your Extremities
You lose a significant amount of heat from your head, hands, and feet.
- Head: A warm hat or balaclava is non-negotiable. A neck gaiter or Buff is also incredibly versatile for protecting your face and neck .
- Hands: Use a system of thin liner gloves for dexterity during activities, and heavier waterproof mittens for when you are less active and need maximum warmth .
- Feet: Wear wool or synthetic socks . Insulated, waterproof boots are a must. For camp, many seasoned winter campers swear by insulated down booties for ultimate comfort after a long day .
Safety, Navigation, and Personal Gear
Winter conditions introduce unique hazards and can make simple tasks more complex. Your preparedness kit needs to reflect these challenges.
Critical Safety and Navigation Gear
- The Ten Essentials+: Every trip should start with the Ten Essentials, but for winter, you need to add to them . This includes an emergency shelter (like a bivy sack) even if you have a tent, and a snow shovel .
- Avalanche Safety Triad: If your trip will take you into or below avalanche terrain, each person must carry a transceiver, probe, and shovel, and—just as importantly—must know how to use them through formal training .
- Navigation: Trails can be completely obscured by snow. You must be proficient with a map and compass . GPS devices are helpful but can fail due to cold-drained batteries or technical issues. Always have a analog backup.
- Illumination: Days are short, so a reliable headlamp is essential. Carry plenty of extra batteries, as cold weather drains them quickly .
Personal Items and Tools
- First-Aid Kit: Upgrade your standard kit for winter. Include chemical heat packs to treat early signs of hypothermia and ample supplies for blister care .
- Sun Protection: The sun’s rays reflect powerfully off the snow. Sunglasses and sunscreen are absolutely essential to prevent snow blindness and sunburn .
- Multi-tool/Knife: A versatile tool is invaluable for gear repairs, preparing food, and countless other camp tasks .
- Personal Comfort and Entertainment: A small towel, hand sanitizer, and a marked bottle for nighttime urination (to avoid leaving the tent) greatly increase comfort . With long hours of darkness, a book, cards, or downloaded podcasts can make tent time more enjoyable .
Pro Tips for a Successful Winter Campout
Gear is only part of the equation. How you use it and conduct yourself is what ultimately leads to a safe and enjoyable trip.
1. Stay Dry to Stay Warm
Moisture is your enemy in the cold. The “C-O-L-D” acronym is a great reminder:
- C = Clean: Dirty clothes lose their loft and insulating power.
- O = Avoid Overheating: Adjust your layers before you start sweating. Dampness from sweat will cool you down rapidly when you stop moving.
- L = Loose Layers: Tight clothing restricts blood flow, which is essential for keeping your extremities warm.
- D = Dry: Brush snow off your clothes before entering your tent and always change into dry sleep clothes .
2. Eat and Drink Strategically
Think of your metabolism as a campfire. Use sugars (like candy) for a quick “fire starter” boost. Use carbohydrates and proteins as your “kindling” for sustained energy. Fats act like the “logs,” providing long-lasting energy to keep your internal fire burning . Drink water or sports drinks regularly, even if you don’t feel thirsty.
3. Prepare for the Elements
- Check Forecasts: Always check the detailed weather and avalanche forecast immediately before your trip and be prepared to cancel or turn back if conditions are dangerous .
- Leave an Itinerary: Provide a detailed trip plan to a friend or family member with clear instructions on when to alert authorities if you do not check in .
Conclusion
Winter camping is a profound and beautiful experience that tests your skills and rewards you with unforgettable solitude. The key to unlocking this adventure lies in meticulous preparation and a thorough understanding of your winter camping gear. By investing in a robust shelter and sleep system, mastering the art of layering your clothing, and prioritizing nutrition and safety, you transform a potentially harsh environment into a welcoming winter wonderland. Use this guide as your roadmap, double-check your packing list, and you’ll be equipped with everything you need to stay safe, warm, and deeply appreciative of the silent, snowy world outside your tent door.