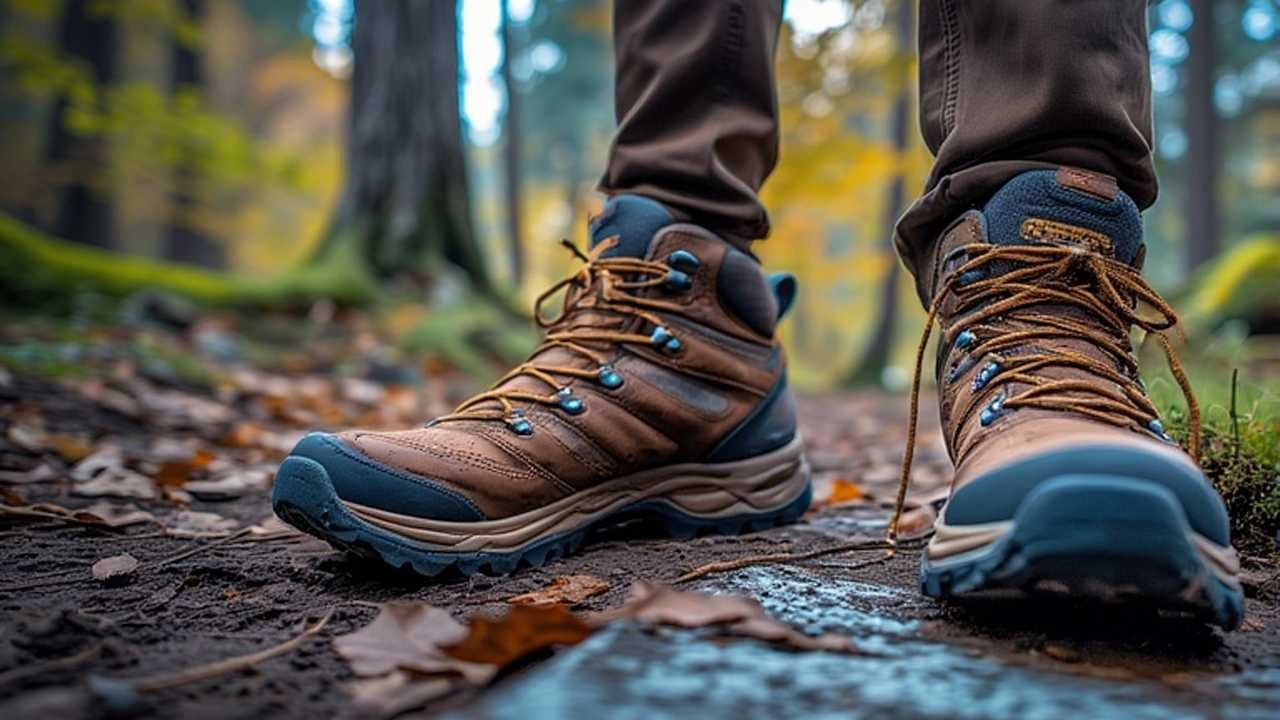
The 5-Phase System to Break In Hiking Boots Quickly Without the Pain
Every hiker knows the exhilarating feeling of unwrapping a new pair of hiking boots, followed by the sobering realization that these pristine shoes need to be transformed into comfortable trail companions. While new hiking boots offer promising protection and support, they simultaneously demand a careful breaking-in process to avoid transforming your dream hike into a painful ordeal filled with blisters and discomfort. The breaking-in process essentially allows the boot materials to soften and gradually adapt to your foot’s unique shape, creating that coveted custom fit that makes miles disappear beneath your feet.
This comprehensive guide will walk you through how to break in hiking boots quickly and comfortably using a proven, systematic approach. We’ll explore everything from initial fit assessment and proper lacing techniques to a practical five-phase breaking-in schedule that safely accelerates the process. Additionally, we’ll provide crucial troubleshooting advice for common issues and specific strategies for different boot materials, ensuring you can hit the trails with confidence and comfort, no matter your timeframe or footwear.
Understanding the Basics: Why Breaking In Matters
Before diving into the methodology, it’s essential to understand what happens during the breaking-in process. New boots, particularly those made with leather, have stiff supportive materials that haven’t yet flexed and molded to your foot’s contours. Wearing them creates friction points that lead to hot spots and blisters if not addressed gradually. The process allows the boots and feet to conform to one another through controlled wear .
The timeframe for breaking in hiking boots varies significantly based on material composition:
- Mesh or synthetic boots: Generally require 1-2 weeks of consistent wear
- Leather boots: Can take 3-6 weeks to fully soften and adapt to your feet
- Stiff mountaineering boots: May need even longer periods of gradual conditioning
Remember that the breaking-in process cannot miraculously transform a poor-fitting boot into a comfortable one. Starting with the right fit is non-negotiable—your boots should feel snug but not tight, with enough room to wiggle your toes while preventing heel slippage .
Essential Preparation Before You Begin
Getting the Perfect Fit From Day One
Your breaking-in success depends heavily on starting with properly fitted footwear. When trying boots, visit a specialty footwear retailer in the afternoon when your feet are naturally slightly swollen, mimicking trail conditions . Wear the same hiking socks you plan to use on the trail and ensure there’s about a thumb’s width of space between your longest toe and the boot’s end. Don’t hesitate to seek expert fitting assistance—footwear specialists can identify subtle fit issues and recommend appropriate models for your foot shape .
Selecting the Right Socks and Insoles
What you wear inside your boots significantly impacts the breaking-in experience. Always wear moisture-wicking socks made of merino wool or synthetic blends, never cotton, which retains moisture and dramatically increases blister risk . If you use aftermarket insoles, insert them from the beginning since they alter the boot’s interior volume and fit. For multi-day hikes, consider liner socks combined with outer socks—this system reduces friction by having the socks rub against each other rather than against your skin.
Mastering Lacing Techniques
Proper lacing secures your foot effectively within the boot, minimizing friction that causes blisters. Experiment with different lacing methods to address specific fit issues . For instance, if you experience heel lift but have adequate forefoot space, try the “heel lock” lacing technique by creating loops near the ankle and crossing the laces through them before tightening. This method provides enhanced ankle security without compromising circulation elsewhere.
Essential Gear for Breaking In Hiking Boots
| Item | Purpose | Recommendations |
|---|---|---|
| Hiking Socks | Reduce friction, wick moisture | Merino wool or synthetic blends; avoid cotton |
| Aftermarket Insoles | Customize fit and support | Insert from day one if using |
| Blister Prevention | Address pressure points | Moleskin, blister pads, specialized creams |
| Lacing Options | Fine-tune fit | Learn multiple techniques for different scenarios |
The Five-Phase Process to Break In Hiking Boots Quickly and Comfortably
Phase 1: Indoor Familiarization (2-3 Days)
Begin your breaking-in journey in the comfort of your home. Wear your new boots indoors for a few hours each day while going about normal household activities . During this phase, focus on achieving proper lacing tension—snug enough to limit foot movement but not so tight as to restrict circulation or cause discomfort. Pay close attention to any immediate pressure points or rubbing, as these indicate areas that may need special attention. Sitting while wearing your boots is also valuable since it simulates rest breaks on the trail and reveals how the boots feel when your blood flow shifts and feet potentially swell .
Phase 2: Neighborhood Exploration (2-3 Days)
Once the boots feel reasonably comfortable indoors, progress to short outdoor walks on even surfaces like pavement or well-maintained paths . Start with brief 15-30 minute strolls around your neighborhood, gradually increasing duration as comfort allows. This phase introduces more varied foot movements and slight terrain changes while maintaining the safety of easy access to home if discomfort arises. Continue monitoring for hot spots, and don’t hesitate to apply preventive blister patches at the first sign of irritation rather than waiting for full-blown blisters to develop.
Phase 3: Varied Terrain With Weight (3-4 Days)
With comfort established on easy ground, incorporate varied terrain and additional weight. Find locations with different surfaces—grass, gravel, gentle slopes—to simulate trail conditions . If you plan to carry a backpack on your hikes, now is the time to start wearing it, initially loaded with minimal weight, gradually increasing to your anticipated trail load. This step is crucial because weight changes how your feet interact with your footwear—increasing pressure points and altering your gait slightly. Still avoid extremely rugged terrain, focusing instead on moderately uneven ground that challenges the boots’ flexibility without overwhelming your feet.
Phase 4: The Controlled Wet Test (1-2 Sessions)
Since your boots will inevitably encounter moisture on the trail, conduct a controlled wet test before committing to long distances . Thoroughly wet your boots (using a hose or walking through water), then wear them for a 2-3 mile hike. This deliberate wetting accelerates the molding process for leather boots and reveals how materials behave when saturated—some boots tighten slightly when wet, potentially creating new pressure points. After this test, allow your boots to dry naturally away from direct heat sources, which can cause materials to crack or shrink.
Phase 5: The Shakedown Hike (1-2 Sessions)
Your final preparation involves completing a trial day hike of moderate length and difficulty . Choose a familiar 5-8 mile trail that offers varied terrain similar to your planned adventures. Pack all your usual hiking gear, including first aid supplies and blister treatment materials. This shakedown cruise validates all previous breaking-in efforts under genuine trail conditions while still providing an opportunity to address any final fit issues. If your boots perform well on this outing, they’re likely ready for extended adventures.
Breaking-In Schedule Overview
| Phase | Duration | Activities | Terrain | Weight |
|---|---|---|---|---|
| Indoor Familiarization | 2-3 days | Household activities | Indoor surfaces | None |
| Neighborhood Exploration | 2-3 days | Short walks 15-30 mins | Pavement, even paths | None |
| Varied Terrain with Weight | 3-4 days | 30-60 minute walks | Grass, gravel, gentle slopes | Gradually increasing pack weight |
| Controlled Wet Test | 1-2 sessions | 2-3 mile hike | Varied terrain | Light daypack |
| Shakedown Hike | 1-2 sessions | 5-8 mile day hike | Trail conditions | Full pack weight |
Boot-Specific Breaking-In Strategies
Leather Hiking Boots
Traditional leather boots typically require the most extensive breaking-in period due to their sturdy construction and less pliable materials. Leather needs time to soften up and conform to your foot’s shape through the combination of foot warmth, moisture, and gradual flexing . For leather footwear, extend each phase of the breaking-in process, never rushing to avoid damaging the materials or your feet. Condition the leather as manufacturer recommended, but only after the initial breaking-in, since some conditioners can over-soften leather if applied too early.
Synthetic and Mesh Boots
Modern synthetic materials and mesh panels break in more quickly but still require a methodical approach. These materials may feel comfortable almost immediately, but the underlying support structures and footbeds still need time to adapt to your feet . While the overall process might be condensed, don’t skip any phases—the quicker adaptation doesn’t eliminate blister risk from seams and interior structure. Synthetic boots often respond well to the wet test phase, with materials conforming quickly when saturated.
Hybrid Boots
Many contemporary boots combine leather, synthetic textiles, and thermoplastic elements, requiring a balanced approach. Focus on the most rigid material in your specific model—if it’s leather-dominated, follow extended timelines; if synthetic-heavy, you might moderately accelerate the process. Hybrid models often feature complex lacing systems that interact differently with various materials, so experiment thoroughly with lacing techniques during early phases.
Boot Material Break-In Comparison
| Material Type | Break-In Time | Key Considerations | Maintenance Tips |
|---|---|---|---|
| Full-Grain Leather | 4-8 weeks | Most durable, slowest to break in | Condition periodically; avoid high heat |
| Suede/Nubuck | 3-5 weeks | More flexible than full-grain | Use specific cleaners for napped leather |
| Synthetic/Mesh | 1-2 weeks | Lightest weight, quickest adaptation | Check seams; clean regularly |
| Hybrid Construction | 2-4 weeks | Varies by material dominance | Follow care instructions for each material |
Troubleshooting Common Breaking-In Issues
Addressing Blisters and Hot Spots
Even with careful breaking-in, you might encounter hot spots—localized areas of warmth and friction that precede blisters. At the first sign, apply blister prevention products immediately . Modern blister pads adhere securely and create protective barriers between your skin and the boot interior. For persistent problem areas, try rubbing a small amount of specialized friction-reduction cream on your feet before wearing your boots. If specific seams cause recurring issues, consider very carefully softening them with a leather punch or hammer, though this risks damaging waterproof membranes, so proceed cautiously.
Dealing With Persistent Pressure Points
Individual pressure points that don’t resolve during breaking-in may indicate fit issues. Try different sock combinations—sometimes slightly thicker or thinner socks provide just enough volume adjustment to alleviate pressure . For boots that are slightly roomy, aftermarket insoles can take up excess volume and improve overall fit. For isolated pressure points, some footwear specialists can selectively stretch specific boot areas using professional stretching equipment—many outdoor retailers offer this service.
When to Consider a Different Size or Model
Despite your best breaking-in efforts, some boots simply won’t work with your foot shape. If you experience significant fit issues like constant heel slippage that doesn’t respond to lacing adjustments, or width problems causing numbness, consult with a footwear specialist . They can evaluate whether your boots need professional stretching or if a different model would better suit your foot morphology. Remember that the most effective breaking-in process cannot compensate for fundamentally poor fit.
Boot Maintenance for Long-Term Comfort and Performance
Cleaning and Care Post-Breaking-In
Once your boots are comfortably broken in, proper maintenance preserves that custom fit and extends their functional life. After each hike, remove dirt and debris with a soft brush, then allow boots to air dry naturally at room temperature. Never place them near direct heat sources like heaters or fires, which can cause materials to crack, shrink, or delaminate. For leather models, periodically apply manufacturer-recommended conditioners to maintain suppleness and water resistance.
Waterproofing Maintenance
Most modern hiking boots feature waterproof membranes that require occasional refreshing to maintain effectiveness. After thorough cleaning and drying, apply appropriate waterproofing treatments matched to your boot’s exterior materials. Spray-on treatments work well for synthetic and nubuck leather, while wax-based products benefit full-grain leather. Always test treatments on small, inconspicuous areas first to ensure they don’t discolour materials.
Storage Recommendations
Proper storage between adventures maintains your boots’ broken-in comfort. Store in a cool, dry place away from direct sunlight, which can degrade materials over time. Avoid compressing the ankle collar and tongue, and use boot shapers or simply stuff with newspaper to help maintain shape. For long-term storage, consider loosening laces entirely to reduce constant tension on eyelets and speed lacing systems.
Frequently Asked Questions (FAQs)
Can you break in hiking boots in one day?
While technically possible with very flexible mesh boots, breaking in boots in 24 hours is highly discouraged . Attempting to do so requires wearing them for 10-12 hours continuously, almost guaranteed to create significant foot soreness and blisters. The process simply can’t be rushed safely—your feet need time to adapt gradually, and the boot materials require multiple wear sessions to properly soften and conform. Time and mileage distributed over days provide essential feedback on fit issues that you can’t possibly identify in a single marathon session.
How should hiking boots fit when new?
New hiking boots should feel snug but not tight throughout, with no noticeable pinching or pressure points . Your toes should have adequate room to wiggle freely without touching the boot’s end, and your heels should remain securely in place with minimal lift (about 1/4 inch) when walking. Remember that boots will not stretch lengthwise during breaking-in, though they may gain minimal volume as materials soften. When trying on new boots, wear your intended hiking socks and spend substantial time walking on inclined surfaces in the store if possible, since downhill hiking particularly tests fit.
What’s the difference between breaking in leather versus synthetic boots?
The primary differences lie in the time required and technique emphasis . Leather boots, particularly full-grain varieties, demand longer periods (often 4-8 weeks) and respond well to gradual conditioning and the controlled wet test. Synthetic and mesh boots break in more quickly (1-2 weeks) but still require systematic breaking-in to adapt interior structures and avoid blisters. Leather molds more significantly to your foot shape over time, while synthetic materials soften but offer less customization through wear.
Why do my boots still hurt after the breaking-in period?
Persistent discomfort suggests either an incomplete breaking-in process or fundamental fit issues. If pain localizes in specific areas, you might need targeted stretching or additional focused breaking-in. More generalised discomfort, especially numbness or significant heel slippage, often indicates poor fit that breaking-in cannot resolve. Consult with footwear specialists who can assess whether your boots need professional modification or if alternative models would better suit your foot shape and hiking style.
Can I speed up the process with artificial methods?
While some methods like carefully wearing wet boots can accelerate adaptation, most shortcuts create more problems than they solve . Avoid aggressive techniques like soaking boots and wearing them for extended periods, which can damage materials and guarantee blisters . Similarly, using external heat sources to soften materials risks permanent damage to adhesives, leather, and waterproof membranes. The most effective acceleration comes from consistent, daily wear following the phased approach outlined above rather than risky shortcuts.
Conclusion
Breaking in hiking boots properly represents one of the most crucial investments you can make in your trail comfort and performance. By methodically following the five-phase process—progressing from indoor wear to controlled shakedown hikes—you systematically develop that perfect synergy between foot and footwear that transforms rigid new boots into trusted trail companions. This gradual approach not only prevents the misery of trail blisters but also extends the functional life of your footwear by allowing materials to adapt without undue stress.
Remember that the breaking-in process doesn’t end with your first major hike—boots continue to subtly adapt to your feet over their entire lifespan. Continue monitoring fit and comfort, addressing minor issues before they become trip-ruining problems. Your patience during this process pays exponential dividends when you’re miles from the trailhead, focused on breathtaking scenery rather than foot discomfort. For more guidance on preparing for outdoor adventures, explore our essential day hiking gear checklist to ensure you’re fully equipped for your next journey.
For additional expert guidance on footwear selection and care, consult the comprehensive resource at REI’s expert advice on breaking in hiking boots, which offers valuable complementary information from footwear specialists .