Essential Hunting Safety Rules Every Beginner Must Know
Hunting represents one of America’s most treasured outdoor traditions, but it necessitates strict adherence to safety regulations that safeguard both hunters and other outdoor lovers. Prior to your first hunt, you should be aware of and follow basic safety precautions to avoid mishaps, save lives, and establish good habits that will benefit you for the rest of your hunting career. These fundamental hunting safety guidelines cover handling firearms, being aware of the terrain, communicating effectively, choosing the right equipment, and being ready for emergencies. These are all important factors that distinguish responsible hunters from those who endanger themselves and others needlessly.
Novice hunters need to understand that safety training is much more than just finishing a hunter education course; it calls for constant practice, situational awareness, and a steadfast dedication to tried-and-true safety practices in the field. According to data from the International Hunter Education Association, states that require hunter education programs had far lower rates of hunting-related mishaps, demonstrating the obvious link between preparation and knowledge and safer hunting experiences. These fundamental safety guidelines are applicable everywhere and serve as the cornerstone of moral, responsible hunting methods that preserve our outdoor legacy for coming generations, whether you’re hunting large game in mountainous areas or ducks in marshes.
Fundamental Firearm Safety Rules for Hunters
Every hunting trip begins with proper firearm safety knowledge. These non-negotiable rules apply in all situations, regardless of experience level or hunting conditions.
The Four Cardinal Rules of Gun Safety
- Treat every firearm as if it is loaded – Never assume a gun is unloaded without personally verifying the chamber and magazine
- Never point the muzzle at anything you are not willing to destroy – Maintain constant awareness of where your barrel points at all times
- Keep your finger off the trigger until ready to shoot – Rest your trigger finger along the frame or receiver until you have identified your target and made the decision to fire
- Be certain of your target and what lies beyond it – Verify a safe backstop exists and understand bullet travel distance for your caliber
Safe Firearm Handling Procedures in the Field
| Safety Action | Proper Technique | Why It Matters |
|---|---|---|
| Loading the firearm | Load only when you reach your hunting area and are ready to hunt | Prevents accidental discharge during transport |
| Crossing obstacles | Unload completely before crossing fences, streams, or difficult terrain | Eliminates discharge risk during physical challenges |
| Climbing tree stands | Use a haul line; never carry loaded firearms up or down | Falls with loaded firearms cause severe injuries |
| Entering/exiting vehicles | Always unload before entering enclosed spaces | Confined spaces increase accident severity |
| Handing to another person | Open action, visually show clear chamber, hand over with action open | Creates verification opportunity for both parties |
| End of hunt | Unload immediately when done hunting for the day | Prevents home or vehicle accidents |
Action Types and Safe Handling Practices
Different firearm actions require specific safety considerations that beginners must understand thoroughly:
Bolt-Action Rifles
- Keep bolt open when not actively hunting
- Visually and physically verify empty chamber
- Bolt removal provides additional safety during transport in many models
Semi-Automatic Firearms
- Check chamber AND magazine independently
- Understand that removing magazine does not clear the chamber
- Operate action multiple times to ensure complete clearing
Break-Action Shotguns and Rifles
- Carry broken open when walking between spots
- Visual verification of empty chambers is immediate
- Most foolproof action type for beginners to maintain safety
Pump-Action Shotguns
- Pump action open for visual chamber verification
- Magazine tube may still contain shells when chamber is empty
- Practice muscle memory for rapid safe clearing
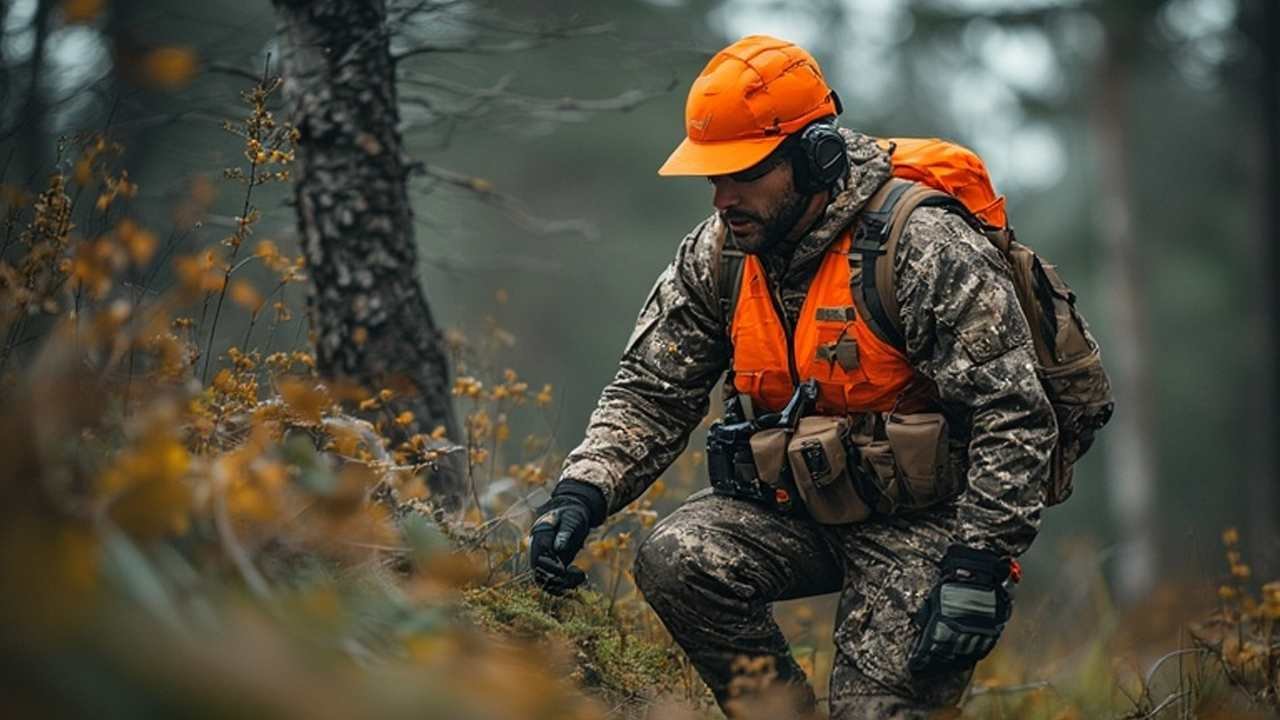
Hunter Orange Requirements and Visibility Standards
Visibility to other hunters represents your primary defense against being mistaken for game. Hunter orange requirements vary by state but universally serve the same critical purpose.
State-Specific Hunter Orange Regulations
Understanding your hunting location’s requirements prevents violations and safety compromises:
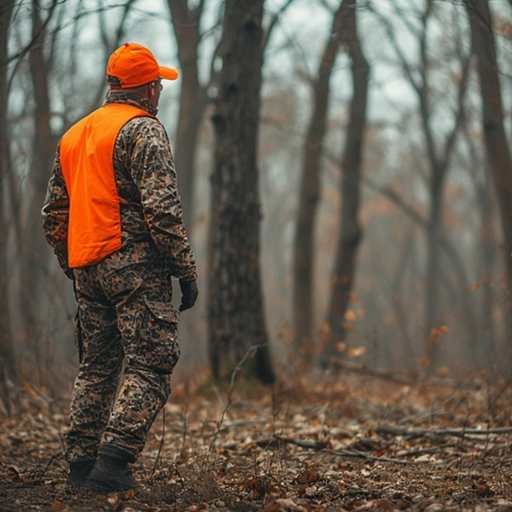
- Minimum square inches of hunter orange required – Ranges from 250 to 500 square inches depending on state
- Placement requirements – Most states require orange above the waist or as a hat and vest combination
- Exemptions – Certain hunting types (waterfowl, turkey in some states) may have different requirements
- Fluorescent pink alternatives – Some jurisdictions now accept blaze pink as equally visible
- Camouflage pattern restrictions – Solid orange typically required, though some states allow orange camo
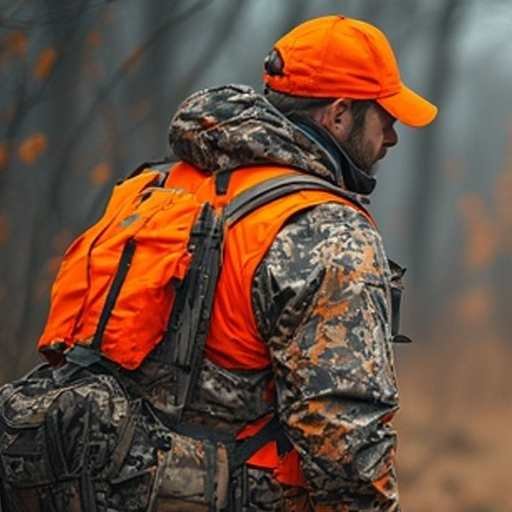
Optimal Visibility Gear Configuration
- Blaze orange hat or cap – Provides 360-degree visibility and protects from above
- Hunter orange vest or jacket – Covers torso area for front and rear visibility
- Orange gloves for late season – Maintain visibility when heavy cover conceals body
- Reversible outer layers – Allow compliance when moving between species with different requirements
- Reflective elements – Additional stripes increase visibility in low-light conditions
- Orange marker for tree stands – Flag or banner identifies occupied stands to other hunters
Experienced hunters often exceed minimum requirements because additional visibility provides extra insurance. The National Shooting Sports Foundation research demonstrates that hunter orange reduces mistaken identity incidents by over 50% compared to areas without requirements.
Tree Stand Safety Protocol and Fall Prevention
Elevated hunting positions offer advantages but introduce significant fall risks. Tree stand accidents cause more hunting injuries than any other single factor.
Pre-Season Tree Stand Preparation
| Preparation Task | Implementation Steps | Safety Impact |
|---|---|---|
| Stand inspection | Check all welds, bolts, cables, and straps for wear or damage | Prevents catastrophic failure during use |
| Safety harness inspection | Examine stitching, buckles, and attachment points; replace after any fall or after 3-5 years | Ensures fall arrest system functions when needed |
| Practice sessions | Rehearse climbing, hanging, and emergency scenarios at ground level | Builds muscle memory for safe movements |
| Tree selection | Choose healthy, straight trees of adequate diameter (minimum 12 inches for hang-ons) | Provides stable, secure mounting platform |
| Access method review | Inspect ladder sections, climbing sticks, or steps for integrity | Prevents falls during ascent and descent |
Three-Point Contact Climbing System
The foundation of safe tree stand access requires continuous connection:
- Maintain three points of contact always – Two hands and one foot, or two feet and one hand touching the access method
- Utilize lineman’s belt during setup – Keeps you secured while positioning stand or steps
- Attach safety harness before leaving ground – Tether should be connected from the moment you leave earth
- Use prusik knot or rope-style lifeline – Maintains constant fall protection throughout climb
- Position tether above head level when seated – Reduces fall distance and prevents hanging injury
Full-Body Harness Requirements
Modern full-body harnesses have replaced outdated waist belts for critical safety improvements:
- Weight distribution across shoulders, waist, and legs – Reduces suspension trauma risk
- Integrated suspension relief straps – Allow you to stand in harness while waiting for rescue
- Clear size chart and adjustment instructions – Proper fit essential for function
- Certification to TMA standards – Ensures meeting Treestand Manufacturer’s Association safety testing
- Annual replacement or after any fall – Materials degrade; previous stress compromises integrity
Statistics from the Treestand Safety Awareness Foundation indicate that consistent harness use from ground to tree and back prevents virtually all serious tree stand injuries. Many hunters who become comfortable in stands develop dangerous complacency—maintain rigorous safety standards on every single hunt.
Zone-of-Fire Awareness and Communication
Understanding shooting zones and maintaining clear communication with hunting partners prevents the majority of hunting accidents involving multiple hunters.
Establishing Clear Zones of Fire
When hunting with others, predefined shooting directions eliminate confusion:
- Pre-hunt zone assignment discussion – Each hunter receives specific safe direction(s) before dispersing
- Natural boundaries as dividers – Use roads, ridges, waterways to create obvious separation
- Degree range specification – Assign specific compass degree ranges (Example: Hunter A covers 270° to 360°)
- Elevation consideration – Discuss uphill and downhill shot restrictions based on terrain
- Modification protocols – Establish how to communicate if animals move requiring zone adjustments
- Written zone maps – Physical diagrams prevent miscommunication in complex terrain
Safe Hunting Formation Guidelines
| Formation Type | Application | Safety Considerations |
|---|---|---|
| Line/Side-by-Side | Open terrain drives | Maintain visual contact; never shoot ahead of line; communicate constantly |
| Staggered Line | Moderate cover drives | Offset positions by 10-15 yards; prevents crossfire situations |
| Posted Hunters with Drivers | Dense cover game drives | Standers wear extra orange; drivers never shoot toward standers |
| Solo Stand Hunting | Individual tree stand/blind setups | Minimum 200-yard spacing; mark stand locations on shared maps |
| Still Hunting (Walking) | Single hunter stalking | Most inherently safe but requires excellent target identification |
Communication Technology and Backup Plans
Modern communication devices enhance safety but require protocols:
- Two-way radios with privacy codes – Establish check-in schedules (every 1-2 hours minimum)
- GPS tracking/sharing devices – Allow partners to monitor positions in real-time
- Emergency signal patterns – Three of anything (whistles, shots, light flashes) signals distress
- Predetermined meeting times and locations – If communication fails, everyone knows rally point
- Written emergency contact information – All hunters carry card with group member details and emergency services
- Battery backup and protection – Cold weather drains batteries; carry spares in warm pockets
The U.S. Fish and Wildlife Service hunting incident reports consistently show that hunters who maintain active communication and established shooting zones experience dramatically fewer accidents than those hunting without coordination.
Target Identification and Background Assessment
Hasty shooting causes preventable tragedies. Absolute certainty of target identity and safe backstop is non-negotiable.
The Total Identification Checklist
Before raising your firearm toward any movement or shape:
- Positively identify the entire animal – See full body profile, not just antlers, ears, or tail
- Verify species and legality – Confirm it matches your tag and season regulations
- Assess sex and maturity if restricted – Many regulations specify antler restrictions or sex
- Examine for hunter orange – Scan entire area around animal for presence of other hunters
- Check for domestic animals – Livestock, horses, and pets exist in many hunting areas
- Verify safe shooting hours – Legal shooting light defined by state regulations
- Ensure ethical shot angle and distance – Only take shots within your practiced capability
Background and Beyond Assessment
Understanding bullet trajectory and energy prevents unintended impacts:
| Firearm Type | Maximum Effective Range | Typical Bullet Travel Distance | Background Requirement |
|---|---|---|---|
| Shotgun (birdshot) | 40 yards | 200-300 yards | Sky or tall vegetation |
| Shotgun (buckshot) | 50 yards | 400-600 yards | Substantial earth berm |
| Modern rifle (.308, .30-06) | 300+ yards | 2-3+ miles | Hill or mountain backdrop |
| Muzzleloader | 150 yards | 1+ mile | Solid earth backstop |
| Archery equipment | 40 yards | 250-300 yards | Earth or dense vegetation |
Critical Background Considerations:
- Bullet deflection risks – Branches, brush, and even tall grass can deflect bullets unpredictably
- Ricochet potential – Water, rocks, and frozen ground create dangerous bounce possibilities
- Elevated shot angles – Downward shots travel farther than shooters typically estimate
- Terrain awareness – Know what lies beyond immediate visible background (roads, buildings, neighboring properties)
Sound and Movement Identification
Game animals produce distinctive sounds and movements, but so do humans and livestock:
- Rhythmic walking patterns – Two-beat human footfalls versus four-beat ungulate gaits
- Equipment sounds – Clicking, rattling, or synthetic sounds indicate human presence
- Scale and proportion – Compare size to known references (tree diameter, vegetation height)
- Time of observation – Spend sufficient time (30+ seconds minimum) observing before concluding identity
- Use optics always – Quality binoculars reveal details invisible to naked eye
The International Hunter Education Association emphasizes that rushing shots causes far more missed opportunities than careful identification, while patient verification eliminates accidents.
Weather Awareness and Hypothermia Prevention
Environmental conditions create hazards that demand preparation and recognition. Cold weather threats often receive insufficient attention from beginners focused primarily on shooting safety.
Temperature and Wind Chill Management
Understanding cold weather physiology prevents potentially fatal situations:
- Layer system implementation – Base layer (moisture-wicking), mid layer (insulation), outer layer (wind/water protection)
- Cotton avoidance principle – “Cotton kills” because it retains moisture and loses insulating properties
- Extremity protection priority – Fingers, toes, ears, and nose lose heat rapidly and suffer frostbite first
- High-energy food consumption – Body requires significant calories to maintain core temperature
- Hydration despite cold – Dehydration occurs in cold weather; water needs remain high
- Emergency shelter materials – Carry space blanket and fire-starting materials on every hunt
Recognizing Hypothermia Warning Signs
| Stage | Body Temperature | Symptoms | Required Action |
|---|---|---|---|
| Mild | 95-97°F | Shivering, confusion, slurred speech, fumbling hands | Remove wet clothing, add layers, warm beverages, light activity |
| Moderate | 90-95°F | Violent shivering or shivering stops, irrational behavior, drowsiness | Immediate warming, hot liquids if conscious, prepare for evacuation |
| Severe | Below 90°F | Shivering stops, difficulty speaking, confusion progresses to unconsciousness | Emergency medical evacuation required immediately; life-threatening situation |
Weather-Related Decision Making
Experienced hunters cancel or modify hunts based on conditions that would endanger safety:
- High wind restrictions – Sustained winds over 25 mph create tree stand hazards and shot deflection risks
- Precipitation caution – Rain and snow obscure vision and create slippery conditions
- Lightning protocols – Immediately leave elevated stands, seek low ground away from isolated trees
- Temperature extremes – Below 0°F or above 90°F require additional precautions
- Limited visibility conditions – Fog and blowing snow reduce safe shooting and navigation capability
Integrating outdoor camping tips and tricks into your hunting preparation enhances cold-weather management skills applicable to extended hunting trips.
Navigation, Communication, and Getting Un-Lost
Even experienced outdoorsmen occasionally become disoriented. Preparation and proper response prevent inconvenience from becoming emergency.
Essential Navigation Tools and Redundancy
Never venture into hunting areas without multiple navigation methods:
- Topographic map of hunting area – Paper maps function without batteries; learn to read contours and terrain features
- Magnetic compass and skill to use it – Practice taking and following bearings before hunting season
- GPS device with marked waypoints – Mark truck, camp, stand locations, and key landmarks
- Smartphone with offline maps – Download area maps for use without cellular service
- Personal locator beacon (PLB) or satellite messenger – Emergency communication when beyond cell coverage
The STOP Protocol for Disorientation
If you realize you’re uncertain of location, immediately implement this proven system:
S – Stop Moving
- Continued random walking worsens the situation exponentially
- Sit down, calm breathing, reduce panic response
T – Think
- Review your last known position and direction of travel
- Examine terrain features visible and compare to mental map
- Calculate approximate time and distance since last certainty
O – Observe
- Look for terrain features (ridges, valleys, water) that appear on your map
- Listen for sounds (roads, water, equipment) that indicate direction
- Check sun position or stars for cardinal direction confirmation
P – Plan
- Decide whether to stay put (if people know your location) or self-rescue
- If moving, choose direction based on terrain features, not gut feeling
- Mark your current location and note the time
Search and Rescue Cooperation
If the situation requires outside assistance, specific actions improve rescue efficiency:
- Stay in one location once you’ve called for help – Searchers work from last known position
- Make yourself visible and audible – Create signal fires (three fires in triangle pattern), use whistle regularly
- Preserve phone battery – Turn off unnecessary functions; make periodic brief location calls
- Respond to searcher calls – Yell, whistle, shine light toward any sounds of search activity
- Prepare shelter – Use available materials to protect from elements while waiting
The National Park Service reports that most hunter “rescues” involve individuals who recognized disorientation early, stopped moving, and communicated their situation rather than those who panicked and continued walking.
Safe Firearm Transportation and Storage
Legal compliance and safety extend beyond the actual hunt to every moment firearms are in your possession.
Vehicle Transportation Requirements
Federal and state laws govern firearm transport, with variations by jurisdiction:
- Unloaded status mandatory – Remove all ammunition from chamber and magazine before placing in vehicle
- Cased or secured requirement – Many states require firearms in cases or locked in trunk
- Ammunition separation – Keep ammunition in separate compartment from firearms when possible
- Action open or disabled – Visible open actions demonstrate compliance during traffic stops
- Concealed carry permit considerations – Rules change if you possess valid CCW permits
- State border crossings – Research destination state laws before crossing state lines with firearms
Home Storage Security Standards
Responsible gun ownership includes preventing unauthorized access:
| Storage Method | Security Level | Best Application |
|---|---|---|
| Cable lock through action | Basic | Temporary security; prevents firing but not theft |
| Lockable hard case | Moderate | Transport and short-term storage |
| Stack-on style cabinet | Moderate | Budget-friendly long-term storage for several firearms |
| Gun safe (fire-rated) | High | Optimal home storage; protects from theft and fire |
| Biometric quick-access safe | High | Balances security with rapid access for home defense |
Cleaning and Maintenance Safety
Regular firearm maintenance requires the same safety discipline as hunting:
- Clear firearm before cleaning – Verify empty chamber and magazine in well-lit area
- Second verification – Double-check empty status before beginning disassembly
- Ammunition in different room – Eliminate possibility of loading during cleaning
- Follow manufacturer’s instructions – Improper disassembly damages firearms and creates hazards
- Function test after reassembly – Verify proper operation with dummy rounds or snap caps before loading live ammunition
Many hunters prepare their firearms just before season by confirming zero at the range. Integrate basic wilderness first aid knowledge with your equipment preparation since ranges and hunting areas present injury risks requiring immediate response capability.
Physical Fitness and Medical Preparedness
Hunting demands physical exertion often in remote areas. Medical emergencies without preparation become life-threatening situations.
Pre-Season Physical Conditioning
Hunters who prepare their bodies suffer fewer injuries and enjoy greater success:
- Cardiovascular endurance building – Walking, hiking with gradually increasing pack weight
- Leg strength development – Squats, lunges, step-ups mimic hunting movements
- Core stability training – Planks and rotational exercises improve shooting stability and prevent back injury
- Flexibility maintenance – Stretching reduces muscle strains during demanding terrain navigation
- Shooting position practice – Kneeling, sitting, prone positions require muscular endurance
- Altitude acclimatization – If hunting at elevation, spend time adjusting before opening day
Essential Hunting Medical Kit
Every hunter should carry compact first aid supplies appropriate for remote environments:
Wound Management:
- Israeli bandage or equivalent pressure dressing
- Hemostatic gauze for severe bleeding control
- Variety of adhesive bandages
- Medical tape and gauze rolls
- Antimicrobial ointment
Environmental Protection:
- Blister treatment (moleskin, Second Skin)
- Sunscreen and lip protection
- Hand/toe warmers for cold weather
- Space blanket for emergency shelter
Medications and Tools:
- Personal prescription medications (3-day supply minimum)
- Pain reliever (ibuprofen or acetaminophen)
- Antihistamine for allergic reactions
- Tweezers for splinter/tick removal
- Small scissors or trauma shears
Communication:
- Waterproof emergency information card
- Photos of medical conditions or device implants
- Emergency contact numbers
Recognizing Cardiac and Stroke Emergencies
The physical demands and excitement of hunting can trigger cardiovascular events, particularly in older or sedentary hunters:
Heart Attack Warning Signs:
- Chest pressure, squeezing, or pain lasting more than a few minutes
- Pain radiating to arm, neck, jaw, or back
- Shortness of breath, cold sweat, nausea, lightheadedness
Stroke Recognition (FAST Method):
- Face – Facial drooping on one side when smiling
- Arm – Arm weakness when raising both arms
- Speech – Slurred speech or difficulty speaking
- Time – Time to call emergency services immediately
Hunters experiencing these symptoms or hunting with someone who exhibits them must prioritize immediate medical evacuation over all other considerations. Activating emergency services early dramatically improves outcomes.
Ethical Shot Selection and Wounded Game Recovery
Responsible hunting includes taking only shots with high probability of clean, quick harvests and thorough tracking of wounded animals.
Shot Distance and Angle Assessment
Different weapons and shooter skill levels dictate ethical maximum ranges:
Rifle Hunters:
- Practice regularly at distance you intend to shoot
- Account for wind, angle, and animal movement
- Understand effective range is far less than maximum range
- Most ethical hunters limit shots to 300 yards or less
Shotgun Hunters:
- Pattern your specific shotgun and load combination
- Recognize rapid energy loss beyond 40-50 yards
- Account for steel shot limitations versus lead (where legal)
Muzzleloader Hunters:
- Understand significantly reduced effective range versus modern rifles
- Consider ignition reliability in wet conditions
- Practice with actual hunting loads, not reduced practice charges
Archery Hunters:
- Know your effective range through extensive practice (typically 20-40 yards)
- Angle compensation is critical with arrows
- Wind drift affects arrows more than shooters realize
Vital Zone Anatomy and Shot Placement
| Game Animal | Primary Vital Zone | Secondary Target | Avoid These Shots |
|---|---|---|---|
| Whitetail Deer | Heart/lung area behind shoulder | High shoulder (spine) | Head, neck, paunch |
| Elk | Heart/lung slightly farther back than deer | Neck (risky; large margin) | Texas heart shot (rear facing) |
| Wild Turkey | Base of neck/wing butt intersection | Head/neck (shotgun only) | Body shots with archery |
| Waterfowl | Center of body mass | Head/neck (close range) | High shots or out of range |
| Wild Hog | Heart/lung behind shoulder low | High shoulder/spine | Frontal shots except with archery |
Post-Shot Protocol and Recovery
Proper response after shooting significantly affects recovery success:
- Mark the exact shot location – Note landmarks, use GPS, place marker
- Mark animal’s last-seen location – Distinct landmark or physical marker
- Observe animal’s reaction – Behavior indicates shot placement and likely recovery time
- Wait appropriate time before pursuit – Poor hits require 30-60+ minutes; lung shots 30 minutes; heart shots can be pursued immediately
- Begin systematic tracking – Start at impact site, search for blood, hair, and sign
- Mark blood trail – Flag or tissue prevents losing established trail
- Proceed quietly and observe ahead – Wounded animals may bed; quiet approach prevents spooking
- Utilize grid search if trail lost – Systematic search pattern from last blood
Blood color and characteristics provide recovery guidance:
- Bright red, frothy – Lung hit; good blood trail typically
- Dark red – Heart, liver, or major vessel; usually short recovery distance
- Greenish-brown content – Paunch hit; requires extended waiting period (4+ hours)
- Watery, reddish – Muscle/non-vital hit; difficult recovery situation
Understanding tracking skills aligns with broader wilderness safety tips to avoid getting lost since recovery efforts often lead hunters into unfamiliar terrain requiring heightened navigation awareness.
Hunter Education and Legal Compliance
Formal education requirements exist in nearly all states, providing standardized safety training that dramatically reduces accident rates.
State Hunter Education Requirements
Hunting license eligibility typically requires completion of approved hunter education:
- Age requirements – Most states mandate certification for hunters born after specific years (commonly 1972-1980)
- Course duration – Traditional courses span 10-15 hours over multiple sessions
- Online options – Many states offer internet field day combinations (online theory + in-person skills evaluation)
- Reciprocity – Most states honor certification from other states
- Certification proof – Carry hunter education card with hunting license
- Bowhunter education – Additional certification required in some states for archery seasons
Curriculum Components
State-approved courses cover essential knowledge areas:
Safety Focus:
- Firearm operation and safe handling procedures
- Tree stand safety and fall prevention
- First aid and emergency response
- Hunter orange requirements and visibility
Legal Knowledge:
- Hunting seasons, bag limits, and license requirements
- Protected species and game identification
- Hunting hours and zone regulations
- Trespass laws and permission requirements
Conservation Ethics:
- Fair chase principles
- Wildlife management concepts
- Habitat conservation importance
- Role of hunters in ecosystem management
Practical Skills:
- Target identification techniques
- Basic marksmanship principles
- Shot placement and recovery strategies
- Responsible wildlife handling
Continuing Education Opportunities
Responsible hunters pursue knowledge beyond minimum requirements:
- Advanced hunter education workshops – State agencies often provide specialized training
- Mentored hunting programs – Pair beginners with experienced hunters
- Species-specific seminars – Waterfowl, turkey, big game strategies and regulations
- Online resources and videos – Quality Education Foundation maintains extensive library
- Conservation organization participation – Groups like RMEF, NWTF provide education and advocacy
The Council to Advance Hunting and the Shooting Sports reports that hunters who engage in continuing education demonstrate safer practices and higher ethical standards throughout their hunting careers.
Emergency Preparation and Survival Mindset
Remote hunting locations and unpredictable situations demand emergency readiness that extends beyond standard first aid.
The Ten Essential Systems for Hunters
Adapted from mountaineering tradition, these systems address wilderness emergency needs:
- Navigation – Map, compass, GPS, knowledge to use them
- Sun protection – Sunglasses, sunscreen, protective clothing
- Insulation – Extra clothing layers beyond what weather predicts
- Illumination – Headlamp, spare batteries, backup flashlight
- First aid supplies – Comprehensive kit with knowledge to apply
- Fire starting – Multiple methods (lighter, matches, ferro rod); waterproof storage
- Repair kit and tools – Multi-tool, duct tape, paracord, knife
- Nutrition – Extra food beyond planned hunt duration
- Hydration – Water or purification method
- Emergency shelter – Space blanket, tarp, or bivy sack
Survival Priority Hierarchy
If an emergency develops (injury, disorientation, weather), address needs in this proven order:
Immediate (First Aid)
- Stop severe bleeding
- Address breathing problems
- Treat for shock
- Stabilize spine injuries
Short-term (Shelter and Warmth)
- Seek or construct weather protection
- Build fire if possible
- Insulate from ground
- Protect from wind and precipitation
Medium-term (Signaling and Communication)
- Activate PLB or satellite messenger
- Attempt cell phone contact
- Create visual signals
- Establish auditory signals
Long-term (Hydration and Nutrition)
- Locate or purify water sources
- Ration existing food supplies
- Maintain core temperature
- Preserve energy
Mental preparation matters as much as physical supplies. The survival mindset prioritizes rational decision-making over panic, maintains hope while accepting reality, and focuses on controllable actions rather than worrying about circumstances.
For comprehensive preparation, review this essential survival kit items checklist to ensure your hunting pack contains appropriate emergency equipment for extended backcountry situations.
Hunting Property Access and Landowner Relations
Trespassing violations cause legal problems and damage hunting’s public reputation. Understanding access rights prevents conflicts.
Public Land Hunting Protocols
State and federal public lands offer extensive hunting opportunities with specific rules:
- Boundary identification – Use mapping apps or paper maps showing exact public land boundaries
- Special regulations – Public lands often have additional restrictions beyond general state hunting laws
- Permit or reservation requirements – Some areas require advance registration or drawing
- Camping and vehicle restrictions – Designated sites and roads only in many management areas
- Respect other users – Hikers, photographers, and other hunters share public resources
- Pack out waste and materials – Leave no trace principles apply to hunting activities
Private Land Permission Best Practices
Access to private property requires respectful communication and clear agreements:
Requesting Permission:
- Contact well before season (weeks or months advance)
- Approach in person when possible; dress appropriately
- Explain your hunting plans specifically (species, methods, areas)
- Offer to provide assistance (property maintenance, wildlife information)
- Accept “no” graciously; never pressure landowners
Maintaining Access:
- Honor all restrictions and agreements precisely
- Keep landowner informed of your presence
- Report property concerns (damaged fences, trespassers)
- Share reasonable portions of harvest if culturally appropriate
- Send thank you notes; consider modest gifts
- Never bring uninvited guests
Written Permission Documentation:
- Carry signed landowner permission forms
- Include property description and boundaries
- Note specific allowed activities and restrictions
- Update annually; don’t assume continuing permission
Electronic Mapping and Property Boundaries
Modern technology eliminates many access confusion problems:
- OnX Hunt, HuntStand, or similar apps – Show property boundaries, landowner names, public access points
- GPS track recording – Documents your route if questions arise
- Offline map downloads – Function without cell service in remote areas
- Waypoint marking – Note access gates, parking areas, stand locations
- Boundary respect – Stay well inside legal boundaries to account for GPS accuracy limitations (±30 feet typical)
The Congressional Sportsmen’s Foundation emphasizes that maintaining positive landowner relationships and respecting property rights ensures future hunting access for entire communities of sportsmen.
Frequently Asked Questions About Hunting Safety
What is the most important safety rule for hunters?
The fundamental principle that avoids almost all firearm mishaps is to treat every firearm as though it were loaded. Regardless of whether you think a gun is empty or not, this way of thinking guarantees that you retain appropriate muzzle control, keep your finger off the trigger, and confirm your aim. The fundamental principle of hunting safety that takes precedence over all other factors is formed by combining this rule with positive target identification, which states that you should never fire at movement, color, or sound without first verifying your precise target and what is beyond.
Do I need to wear hunter orange when hunting on my own private property?
Regardless of property ownership status, state requirements are applied consistently. You must wear hunter orange on private land if your state mandates it for the species and hunting technique you’re using. These regulations are in place because bullets seldom halt at property lines and other hunters may have legal access in the vicinity. Since visibility shields you from trespassers, nearby hunters, and non-hunting property users who could be there without your awareness, savvy hunters frequently go above and above the minimum standards even when they are by themselves.
How long should I wait before tracking a wounded deer?
The location of the shot and the animal’s response have a significant impact on wait time. Before tracking, lung-shot deer (bright red, frothy blood) should be allowed to expire for 30 to 45 minutes. Since heart-shot animals usually go fewer than 100 yards, they may frequently be pursued right away. In order to avoid pushing the deer above its recovery range, paunch-shot deer (greenish stomach content, scarce black blood) need to be left for at least four to six hours or overnight. Err on the side of lengthier waiting times if you are unsure about hit location; hasty tracking pushes injured animals and significantly lowers recovery success.
Can I hunt safely alone or should I always have a partner?
Although it’s widespread and legal, solo hunting necessitates more safety measures than group hunting. Before hunting alone, always let someone know your precise position, anticipated return time, and emergency protocols. Bring communication equipment that are suitable for the region you are in (cell phone in service areas, satellite messenger in wilderness). When engaging in dangerous hobbies like tree stand hunting, lone hunters should exercise extra caution and be ready to save themselves in an emergency. For more animal encounters and personal challenge while adhering to strict safety regulations, many seasoned hunters favor hunting alone.
What should I do if I get lost while hunting?
Stop moving right away and use the STOP protocol: Stop, Think, Observe, Plan. The problem gets much worse if you keep walking while confused. Try to use an emergency gadget or phone to call for assistance while preserving battery life. Use whistle blasts, colourful materials, or signal flames (three triangle-shaped fires) to make oneself heard and seen. Stay still so that searchers can use your last known whereabouts if you told someone about your plans. The majority of hunting “lost” situations end fast when hunters don’t panic and keep going at random; instead, they remain composed, stop moving, and explain their predicament.
Is it safe to hunt with an inexperienced partner?
Establishing explicit safety procedures before going into the field makes hunting with novices safe. Examine weapon safety regulations in detail, designate zones of fire with natural limits, stay in close visual or radio contact, and place the novice where you can watch how they behave. Steer clear of challenging hunting scenarios (such as drives and following injured wildlife) until the companion exhibits sound judgement and responsible rifle handling. Although many seasoned hunters find it fulfilling to guide novices, they also understand that your safety is dependent on your partner’s choices, thus pre-hunt safety talks are a must.
What is the safest type of tree stand for beginners?
Due to its solid ascending access, simple platform entrance, and often lower heights than hang-on or climbing platforms, ladder stands provide the best safety factor for novice elevated hunters. Ladder stands for two people offer additional stability and assurance. Most tree stand accidents may be avoided by installing a sliding rope-style lifeline for the climb, practicing setup and access before season, and wearing a full-body safety harness from the time you leave the ground until you return, regardless of the kind of stand. For first-season hunters, many safety experts advise ground blinds to completely remove fall hazards while honing other hunting techniques.
How do I know if weather conditions are too dangerous for hunting?
Hunts that pose unacceptable hazards should be cancelled or postponed. Tree stand hunting is risky when sustained gusts over 25 mph, and shots can be randomly deflected. Tree stands and high ground must be evacuated immediately in the event of active lightning. Hypothermia or heat sickness can result from temperatures below zero degrees Fahrenheit or above ninety degrees without the proper clothes and resources. Ethical hunting is prevented by heavy precipitation that blurs eyesight beyond a safe shooting distance. Animals will be there if things go better, but once your safety is jeopardised, it cannot be restored. Trust your instincts.
Are mechanical broadheads safer than fixed-blade broadheads?
Compared to fixed-blade heads with exposed cutting edges, mechanical (expandable) broadheads with covered blades minimise the chance of cuts during arrow loading and drawing from a handling standpoint. However, because they don’t have any moving elements that may break, fixed-blade broadheads are sometimes seen to be more dependable for hitting deadly targets. Regardless of the kind of broadhead, safety should prioritise using the right handling techniques: always store arrows in quivers until they are ready to shoot, install them using broadhead wrenches rather than your hands, and transport arrows with tip protection. When hunters adhere to the correct archery safety procedures, both approaches are safe.
Should I tell people exact details of where I’m hunting?
Before hunting, especially when you’re by yourself, always let a trusted person know your precise hunting site, route, and anticipated return time. Give precise locations or map coordinates instead of ambiguous explanations. Your contact person will keep your information private, but it will be crucial if search and rescue needs to find you in an emergency. Some hunters take pictures of where their trucks are and send each other the GPS coordinates. The hours or days that rescuers may save if you are hurt, confused, or don’t return on time outweigh the small discomfort of disclosing information.
Conclusion: Building a Foundation for Safe Hunting
Beginners become responsible sportsmen who safeguard themselves, their friends, and the hunting legacy when they grasp these fundamental hunting safety guidelines. Safety awareness has to develop into automatic, reflexive behaviours that endure in the face of stress, exhaustion, or difficult circumstances. Throughout their careers, seasoned hunters consistently stress these foundations, which are minimum requirements rather than recommendations.
Almost all hunting incidents can be avoided by following established safety procedures, being well-prepared, and making disciplined decisions while hunting. Keep in mind that nothing you hunt in the field is worth risking your safety for as you grow as a hunter. Future seasons will have animals, but accidents cannot be undone to restore your health or the health of others.
Hold yourself to the greatest ethical and safety standards, dedicate yourself to continuing education, and practice safety practices until they come naturally to you. In addition to defining you as a hunter, your respect for weapons, animals, property, and other outdoor users guarantees that future generations will be able to take advantage of the same possibilities and traditions that drew you to the field.